If you are serious about getting faster on the bike, a cycling power meter is the single most valuable piece of equipment you can buy after the bike itself. I have coached riders from first-season amateurs to World Tour professionals, and the pattern is remarkably consistent: the day a rider starts training with power instead of guessing by feel, their progress curve steepens. Power is the only metric that tells you, objectively and instantly, exactly how much work you are doing — in watts, every second, regardless of wind, heat, fatigue, or how motivated you feel that morning.
This guide cuts through the marketing. I will explain how power meters work, the real differences between pedal-, crank-, and spider-based systems, what actually matters for accuracy, and then walk you through the six power meters I most often recommend to the cyclists I work with — with honest pros, cons, and price ranges so you can match the right unit to your riding and your budget.
Why train with a cycling power meter instead of heart rate?
Heart rate is a useful tool, but it is a lagging, noisy signal. When you accelerate, your heart rate takes 20 to 40 seconds to respond. It drifts upward over a long ride even at the same effort (cardiac drift), spikes when you are dehydrated, and sits artificially low on cold mornings or when you are tired. Try to do a precise 30-second interval off heart rate and you will have finished the effort before your heart rate even reflects it.
Power is the opposite. It is the direct, real-time measurement of the mechanical work your legs are producing at the pedals, expressed in watts. Push harder, the number jumps immediately. Ease off, it drops instantly. There is no lag, no drift, and no weather dependency. This is why every measurable performance metric in modern cycling — functional threshold power (FTP), power-to-weight ratio in watts per kilogram, normalized power, training stress — is built on the wattage your power meter records.
The practical payoff comes in three areas. First, pacing: in a time trial, gran fondo, or long climb, holding a steady target wattage prevents the early over-effort that blows up so many riders. Second, precision training: when a session calls for 5 × 4 minutes at 105% of threshold, power lets you nail that target to the watt instead of drifting. Third, tracking fitness: because power is objective, you can compare a workout today against the identical workout three months ago and know, with certainty, whether you have improved. Heart rate can never give you that.
I am not saying abandon heart rate — the combination of the two is powerful, because the relationship between your power and heart rate reveals fatigue, freshness, and aerobic adaptation. If you want to set both up properly, use our heart rate training zones calculator alongside your power data.
How a cycling power meter works
Nearly every power meter on the market uses the same underlying physics. Strain gauges — tiny sensors that change electrical resistance when they flex — are bonded to a part of the drivetrain that twists slightly under load. The unit measures that deflection to calculate torque, combines it with your pedaling cadence (rotational speed), and multiplies the two: power (watts) = torque × angular velocity. It does this hundreds of times per second and transmits the result wirelessly to your bike computer or training app via ANT+ and Bluetooth.
The crucial point for buyers is where the strain gauges sit, because that determines what you are measuring, how accurate it is, and how easily you can move it between bikes. That single decision — pedals, crank arm, or spider — matters far more than the brand on the box.
Pedal-based power meters
Strain gauges live inside the pedal axles. This is the most popular choice for good reason: pedals swap between bikes in five minutes with a single Allen key, making them ideal if you own a road bike and a winter or travel bike. A dual-sided pedal system measures each leg independently, giving true left/right balance. The trade-offs are that you are locked into that pedal's cleat system (Look Keo, Shimano SPD-SL, or Speedplay depending on brand), pedals are the most exposed component in a crash, and stack height is marginally higher than standard pedals.
Crank-arm power meters
A strain gauge is bonded to the inside of one (or both) crank arms. Single-sided crank-arm meters — which measure your left leg and double it to estimate total power — are the most affordable way into power and are largely hidden and crash-protected. The compromise is that single-sided units assume your legs are balanced, which is rarely perfectly true, so the absolute number can be off if you have a significant left/right asymmetry. They are also crank- and frame-clearance dependent, so you must confirm fitment.
Spider- and hub-based power meters
Spider-based units place the gauges in the crank spider (where the chainrings bolt on), measuring total power from both legs at the source — this is the gold standard for accuracy and consistency and is what most professional teams have historically used. Hub-based meters build the gauges into the rear wheel hub. Both are accurate and robust, but moving them between bikes means moving a crankset or a wheel, so they suit riders with one primary bike.
What actually matters when buying a cycling power meter
Ignore most of the spec-sheet noise and focus on these five things, in order of importance.
1. Accuracy claim. Reputable meters quote ±1% to ±2% accuracy. For training, ±2% is perfectly adequate — what matters far more is consistency, that the unit reads the same way today as it did last month, so your trends are real. Independent testing from sources like DC Rainmaker is the best way to verify a manufacturer's claim, and peer-reviewed work comparing popular units against the SRM laboratory reference confirms that most modern meters are accurate enough for serious training (see the validation literature on PubMed).
2. Single vs. dual-sided. Dual-sided gives true total power and left/right balance, which is genuinely useful for tracking injury recovery and pedaling asymmetry. But single-sided saves a lot of money and, for the majority of riders whose balance sits within a few percent of 50/50, the training value is nearly identical. Be honest about whether you will ever act on balance data.
3. Compatibility. Check three things: that it fits your crankset and frame, that it speaks both ANT+ and Bluetooth (so it pairs with any head unit, Zwift, or app), and — for pedals — that you are happy with the cleat system. This is where most buying mistakes happen.
4. Battery type. Rechargeable (USB or magnetic) units like Favero's are convenient and cheap to run. Coin-cell (CR2032) units mean no charging but occasional battery swaps. Neither is wrong; just know which you are buying.
5. Portability. One bike forever? A spider or crank meter is fine. Multiple bikes or you travel with pedals? Pedal-based wins decisively.
The best cycling power meters of 2026
These are the six units I most often put on my athletes' bikes, organized by who each one suits best. Prices are approximate and shift with sales and region, so treat them as ballpark and confirm current pricing before you buy.
1. Favero Assioma — best overall value (pedal-based)
The Favero Assioma is the power meter I recommend more than any other, and it is what sits on a large share of the bikes in my own coaching roster. The dual-sided Assioma DUO delivers genuine ±1% accuracy, true left/right balance, rechargeable batteries that last roughly 50 hours per charge, and rock-solid ANT+/Bluetooth connectivity — at a price well below the big-brand pedal options. The newer PRO MX variants bring Shimano SPD-SL and Xpedo/SPD-compatible bodies for road and gravel.
Pros: outstanding accuracy for the money, moves between bikes in minutes, rechargeable, superb reliability. Cons: uses Favero's pedal body (Look Keo-compatible cleats on the classic model), slightly taller stack height. Best for: almost everyone — the default recommendation for riders who want pro-level data without overpaying. Approx. price: single-sided around $400–500; dual-sided DUO around $650–750. (See Favero's official site for current models.)
2. Garmin Rally — best for cross-platform and gravel riders (pedal-based)
Garmin's Rally series is the most versatile pedal system because the spindles can be moved between three pedal bodies: RK (Look Keo road), RS (Shimano SPD-SL road), and XC (Shimano SPD for gravel, mountain, and commuting). If you live in the Garmin ecosystem and want one power meter that can follow you from the road bike to the gravel rig, nothing else matches it. Accuracy is ±1% and integration with Garmin head units is seamless, including advanced cycling dynamics.
Pros: swappable pedal bodies (road and off-road), excellent Garmin integration, ±1% accuracy. Cons: premium price, coin-cell batteries to manage rather than rechargeable. Best for: Garmin users and anyone who switches between road and gravel/MTB. Approx. price: single-sided around $650; dual-sided (RK200/RS200/XC200) around $1,000–1,100.
3. Wahoo POWRLINK Zero — best for Speedplay devotees (pedal-based)
If you ride Wahoo's Speedplay pedals — loved for their dual-sided entry and wide adjustable float — the POWRLINK Zero is the only way to get power in that platform. It offers ±1% accuracy, clean integration with the Wahoo ELEMNT ecosystem, and the unmistakable Speedplay feel. Available single- or dual-sided.
Pros: the only power option for Speedplay fans, ±1% accuracy, great Wahoo integration. Cons: Speedplay cleats are heavier and need periodic maintenance; price sits at the premium end. Best for: committed Speedplay riders and Wahoo ecosystem users. Approx. price: single-sided around $650; dual-sided around $1,000.
4. 4iiii Precision — best budget entry (crank-arm)
When an athlete tells me their budget is tight but they want real power, the 4iiii Precision single-sided crank-arm meter is my first suggestion. It bonds a lightweight pod to a left crank arm, weighs almost nothing, hides away from crash damage, and claims ±1% accuracy — remarkable at the price. You can buy a factory-fitted arm or send in your own crank to be converted.
Pros: the cheapest credible path into power, light, crash-protected, accurate for a single-sided unit. Cons: single-sided only (no balance, estimates total from the left leg), must match your crank model, coin-cell battery. Best for: budget-conscious riders and anyone with one road bike who just wants reliable training numbers. Approx. price: around $275–350 single-sided.
5. Stages Power / Shimano integration — best for clean crank-based setups
Stages pioneered the affordable crank-arm power meter, and the range now spans single-sided left arms up to dual-sided (Stages LR) systems on Shimano, SRAM, and Cannondale cranks. They are light, well-proven, and the dual-sided versions give full balance data without the exposure of pedals. Shimano also offers its own integrated dual-sided power crank on Dura-Ace and Ultegra for riders who want a factory solution.
Pros: wide crank compatibility, single- and dual-sided options, hidden and protected, light. Cons: fitment depends on your crank and frame clearance (check carefully), some early units had connectivity quirks now largely resolved. Best for: riders who want crank-based power and a clean cockpit on a single primary bike. Approx. price: single-sided around $300–400; dual-sided around $600–730.
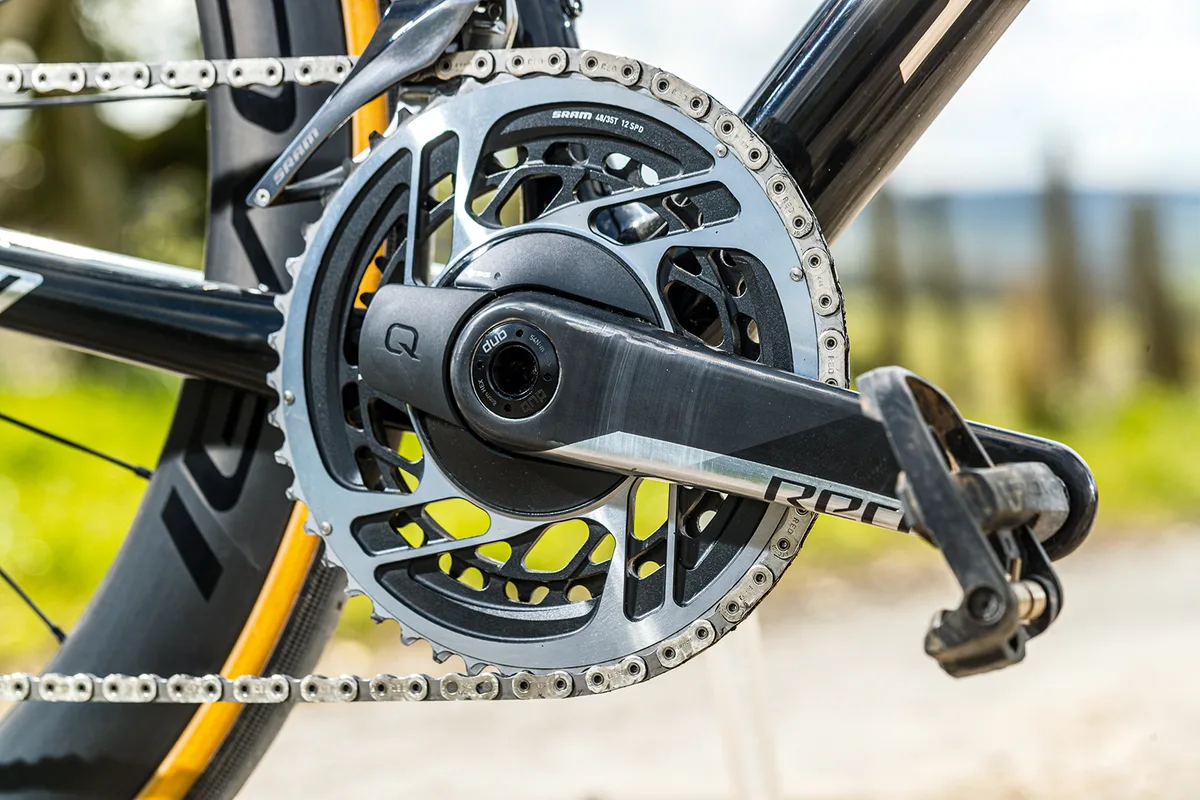
6. Quarq DZero / Power2Max NG — best for accuracy purists (spider-based)
For the rider who wants the most consistent, dual-leg measurement and rarely moves it between bikes, a spider-based meter is the connoisseur's choice. SRAM's Quarq DZero and the Power2Max NG/NGeco measure total power at the spider with excellent accuracy and temperature stability, integrate cleanly with SRAM AXS and standard chainrings, and simply disappear into the drivetrain. This is the category professional teams leaned on for years.
Pros: gold-standard consistency, true total power, robust and temperature-stable, low maintenance. Cons: tied to a crankset so it is the least portable, and you are committing to that chainring/crank standard. Best for: data-focused riders and racers with one main race bike. Approx. price: around $500–800 depending on model and chainrings.
How to choose the right power meter for you
Strip away the brands and the decision becomes simple once you answer three questions.
Do you ride more than one bike, or travel with your bike? If yes, buy pedals — Favero Assioma for value, Garmin Rally if you also ride gravel/MTB, Wahoo POWRLINK if you love Speedplay. The five-minute swap between bikes is worth more than any other feature for multi-bike riders.
Is budget the main constraint? Go single-sided crank arm: the 4iiii Precision or a single-sided Stages will give you accurate, consistent, trainable numbers for well under half the price of a dual-sided pedal set. You lose balance data, not training quality.
Do you have one race bike and want the most bulletproof, consistent data? A spider-based Quarq or Power2Max, or a dual-sided pedal/crank, is your pick. You will get true total power and the kind of month-to-month consistency that makes your training trends trustworthy.
For the vast majority of riders I coach, the honest answer is: buy a Favero Assioma (single-sided if money is tight, dual if not) and stop overthinking it. It is accurate, portable, reliable, and well-priced, and you will spend your energy on training rather than gear.
How to actually use your power data once it's on the bike
A power meter is only as valuable as what you do with the numbers. Here is the practical sequence I take every new athlete through.
Step 1: Establish your FTP. Your functional threshold power — roughly the highest power you can sustain for about an hour — is the anchor for everything. The most common field test is a 20-minute maximal effort, with 95% of your 20-minute average taken as your FTP. Do it on a consistent course or indoor trainer so you can repeat it. Plug your numbers into our FTP calculator to get a clean figure and benchmark.
Step 2: Set your training zones. Once you know your FTP, divide your effort into power zones — recovery, endurance, tempo, threshold, VO2 max, and anaerobic. Each zone drives a specific physiological adaptation, and training to the watt within them is the whole point of owning a power meter. Our power zones calculator will generate your personal zones in seconds.
Step 3: Train to targets, not to feel. When a workout says "4 × 8 minutes at 95–100% FTP," hold those watts. The discipline of staying in the prescribed range — not drifting high on the first interval and dying on the last — is exactly what produces adaptation. Use the lap and target features on your head unit so the number is in front of you.
Step 4: Track power-to-weight. Divide your watts by your body weight in kilograms to get watts per kilogram, the single best predictor of climbing and all-round performance. Watching your FTP in w/kg climb over a season is the clearest evidence your training is working.
Step 5: Manage load over time. Power lets you quantify the training stress of every ride and balance hard work against recovery, so you build fitness without tipping into overtraining. This is where coaching software — and a coach — turns raw watts into a plan.
Common mistakes new power meter users make
Three errors come up again and again. First, skipping the zero-offset/calibration: take ten seconds before each ride to zero your meter (unweighted, per the manufacturer's instructions) so your numbers stay trustworthy. Second, chasing single-second numbers: instantaneous power is spiky, so train and pace off 3-second or lap averages, not the jumpy real-time figure. Third, comparing across different meters: a single-sided crank unit and a dual-sided pedal set can read a few percent apart, so pick one meter and judge your progress against itself, not against your training partner's setup.
Do you still need a power meter if you have a smart trainer?
This question comes up constantly, and the answer is nuanced. A good direct-drive smart trainer — a Wahoo KICKR, Tacx Neo, or Elite Justo — measures power and is excellent for structured indoor work in Zwift or TrainerRoad. If you train almost exclusively indoors, a smart trainer alone can carry you a long way and may delay the need for a dedicated power meter.
But the moment you ride outdoors and want power on the road — for pacing climbs, executing intervals, racing, or analyzing real-world rides — you need a power meter on the bike itself. There is also a consistency issue: trainers and on-bike meters can read several percent apart, so if you do your threshold test indoors on a trainer and then race off zones outdoors with a pedal meter, your targets will be slightly mismatched. The cleanest setup for a rider who trains both indoors and out is a single power meter on the bike, with the bike mounted on a "dumb" or controllable trainer, so the same meter records every watt year-round. If you already own a smart trainer and ride outside, an Assioma or 4iiii is the logical next purchase to unify your data.
Cycling power meter FAQ
How accurate do I really need? For training, ±2% is fine. Consistency matters more than the absolute figure, because your improvement is measured against your own past data. Almost every meter in this guide clears that bar comfortably.
Is single-sided power "wrong"? No — it simply estimates total power by doubling one leg. If your legs are reasonably balanced (most riders are within a few percent), the training value is essentially identical to dual-sided. You only lose the balance metric, not the ability to train and improve.
Will a power meter fit my bike? Pedal-based meters fit virtually any bike. Crank-arm and spider meters depend on your crankset and frame clearance, so always confirm compatibility with the manufacturer's fit checker before buying.
How long do they last? Years. A quality power meter is a long-term investment that will outlast several bikes, which is part of why spending a little more on a reliable unit pays off.
Do I need a coach to use one? No, but a coach dramatically accelerates the return on your investment by turning the data into a structured, progressive plan rather than leaving you to interpret hundreds of metrics alone.
The bottom line
A cycling power meter transforms training from guesswork into measurement. For most riders, the Favero Assioma offers the best balance of accuracy, portability, and price; budget riders should look at the 4iiii Precision; gravel and Garmin users at the Rally; and accuracy purists with one race bike at a spider-based Quarq or Power2Max. Whatever you choose, the meter is only the starting point — the gains come from how intelligently you use the data.
That is exactly where structured coaching pays for itself. If you want a professional to turn your power numbers into a plan that actually makes you faster, apply for one-on-one coaching or explore our tailored training plans built around your power data, your goals, and your schedule. Buy the meter — then let's make every watt count.